How To Harvest Garlic With Foolproof Methods
By Mlbrun Team
On Mar 11, 2024

This post may contain affiliate links. If you make a purchase through links on our site, we may earn a commission.
With its pungent aroma and distinctive flavor, Garlic has long been celebrated not only for its culinary uses but also for its medicinal properties. Belonging to the Allium genus, along with onions and leeks, garlic is a staple ingredient in kitchens worldwide. Beyond its culinary prowess, garlic is revered for its potential health benefits, including boosting the immune system and promoting heart health.
As this plant matures underground, the time for harvesting should always be made under careful consideration. Once the garlic bulbs have reached their full size and the foliage begins to dry and turn brown, it's a sign that the bulbs are ready to be harvested. Harvesting garlic at the right moment guarantees a bountiful yield of fresh and potent bulbs.
When to Harvest Garlic
Garlic can be harvested at various stages of maturity, depending on the size of bulbs you desire. If you are looking for smaller bulbs, you may opt to harvest them earlier, while larger bulbs require more time to develop. Keep in mind that garlic bulbs continue to grow until they are harvested, so leaving them in the ground longer generally results in larger bulbs.
As the bulbs mature, the lower leaves of the plant will start to turn yellow or brown and begin to die back. This is a natural process indicating that the bulbs are nearing maturity. In general, most garlic varieties are typically ready for harvest about 4 to 6 months after planting. This means you can expect to harvest them anywhere from 120 to 180 days after planting.
These are the key signs that your garlic is ready to be harvested:
- The leaves begin to turn yellow and brown from the bottom up, with about half of the leaves remaining green.
- The flower stalk (scape) has emerged and may have begun to curl at the tip.
- The bulbs feel firm and heavy when you gently dig around them.
How To Harvest Garlic

Harvesting garlic is not an overly complicated process but you may need caution prevent any unintentional damage. Avoid pulling the bulbs too forcefully as it can harm the plant.
Be cautious not to bruise or puncture the cloves, which may lead to spoilage during storage. Additionally, refrain from leaving garlic bulbs in the ground for too long after they're matured as this can cause them to split or become overripe.
Now that you've learned what to avoid, let's find out the correct process of harvesting garlics.
- Harvest when the lower leaves turn yellow and begin to dry, typically mid to late summer, depending on the variety.
- Gently loosen the soil around the bulbs using a garden fork to avoid damaging them.
- Carefully lift the bulbs out of the ground, keeping foliage intact.
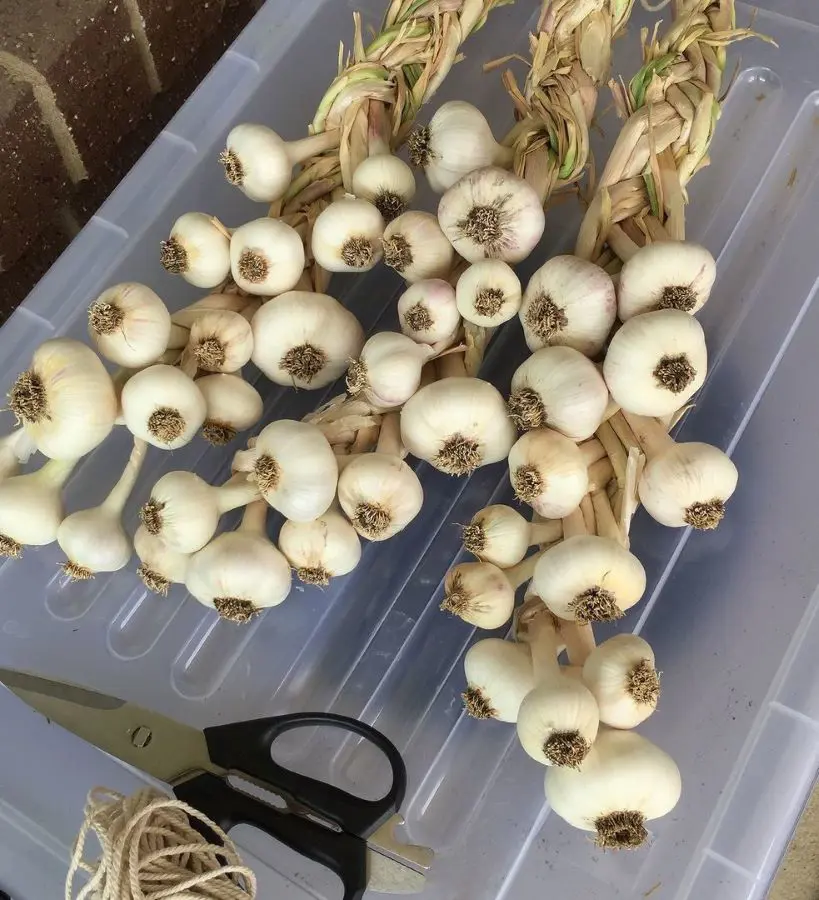
- Hang the garlic in bundles or lay them out in a single layer in a warm, dry, and well-ventilated area for 2-4 weeks to cure.
- Once cured, trim the roots and cut back the foliage to about an inch above the bulb.
- Store cured garlic in a cool, dry, and dark place with good air circulation to prevent sprouting and prolong shelf life.
- Set aside the largest, healthiest bulbs for replanting in the next growing season.
Below, we have discussed each step for harvesting garlic in detail:
Prepare Garlic For Harvest
Once the leaves on your garlic begin to dry, refrain from watering the plants for about a week to ten days. This dry period helps the outer layers of the garlic bulbs to cure, making them easier to store. If the soil is excessively moist at the time of harvest, it can lead to issues like mold and rot during storage.
Stick your finger into the soil near the garlic plants to a depth of a few inches. The soil should feel relatively dry but still slightly moist. If the soil feels excessively wet or muddy, it's best to wait a few more days before harvesting to allow the soil to dry out further.
What You Will Need To Harvest
Make sure to harvest garlic when the bulbs are mature but not overripe. Overripe garlic may begin to split or rot, which can reduce its storage life. Proper timing and using the right tools will help ensure a successful garlic harvest.
- Garden fork or spade
- Knife or kitchen scissors
- Bucket or basket
- Hand trowel
- Gloves
Monitor Growth For Harvest
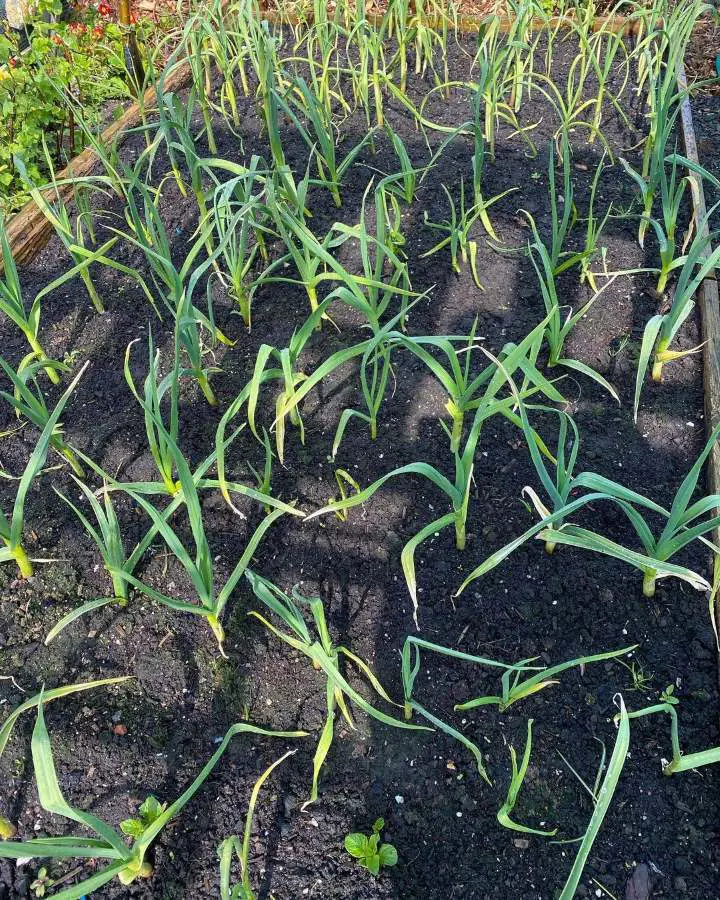
As your garlic plants mature, it's important to closely monitor their progress. Look out for the telltale signs indicating they are ready for harvest, such as the lower 1-2 leaves turning yellow while the upper leaves remain green. This visual cue suggests that the bulbs have reached maturity and are ready to be harvested.
To confirm readiness, carefully dig up a sample plant to assess the bulb size and development. A mature garlic bulb should feel firm and have well-developed cloves. The cloves themselves should appear plump and remain intact, without separating from each other. If the bulb possesses these properties, you're good to proceed with harvesting.
Loosen The Soil
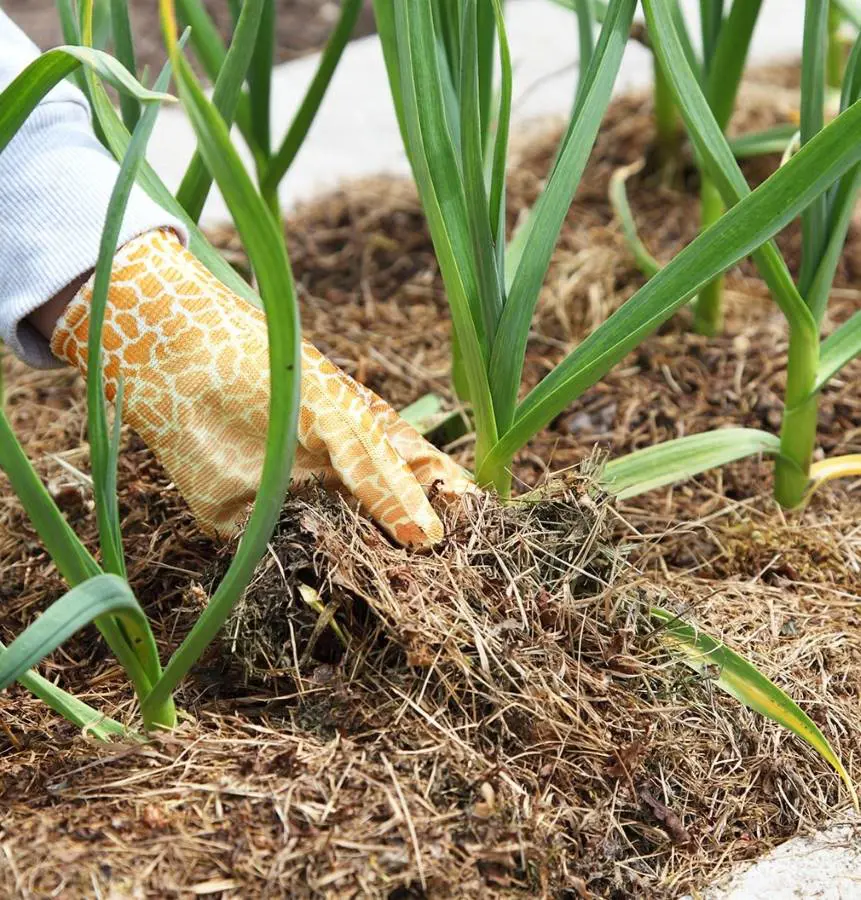
Before grabbing your tools, take a moment to assess the condition of the soil. If the soil is dry, watering it lightly beforehand can make it easier to work with. However, avoid overwatering as excessively wet soil can be heavy and more difficult to manage. Choose a suitable tool for loosening the soil, such as a garden fork or trowel.
Begin loosening the soil around each garlic plant systematically. Insert the garden fork or trowel into the soil a few inches away from the base of the plant, taking care to maintain a gentle angle to avoid piercing the bulbs. Loosening the soil before harvesting makes it easier to lift the bulbs out without causing damage.
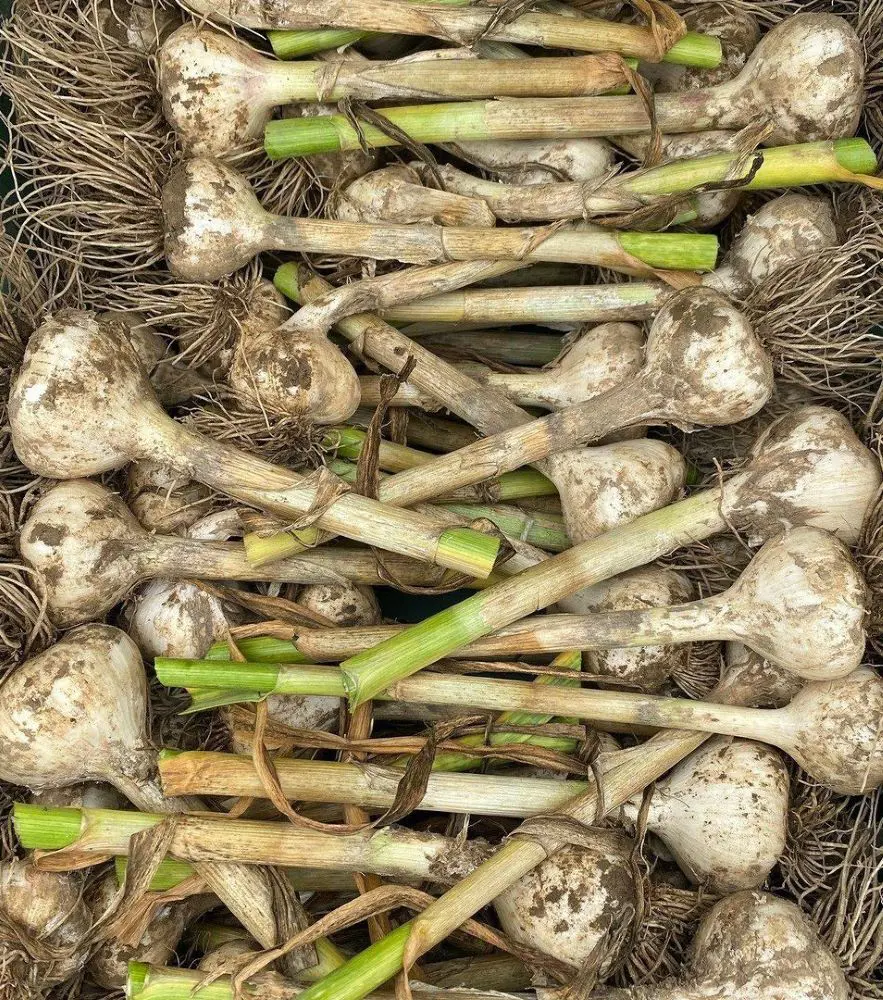
Dig Up The Bulbs Carefully
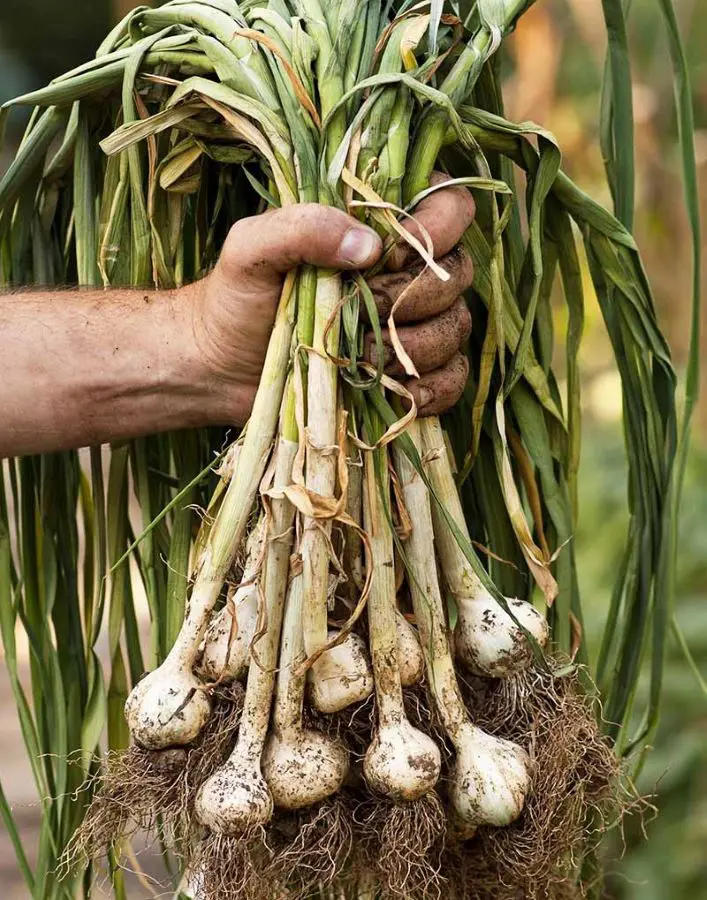
Garlic bulbs normally do not pull out easily from the ground like some other root vegetables such as radishes or carrots. When it is ready to harvest, the bulbs are usually firmly anchored in the soil by their roots. So, you should carefully loosen the soil around them with a garden fork before lifting the bulbs out.
Carefully dig each bulb from the ground by inserting a garden fork a few inches away from the base of the plant into the soil. Gently lift upwards to loosen the bulb, avoiding pulling directly on the stem to prevent damage.
Here are simple steps for digging garlic:
- Gently loosen the soil around the garlic bulbs with a garden fork or shovel.
- Lift the bulbs out of the ground, ensuring not to damage them.
- Shake off excess soil from the bulbs.
- Trim any remaining roots attached to the bulbs.
- Rinse the bulbs if necessary and set them aside for further use.
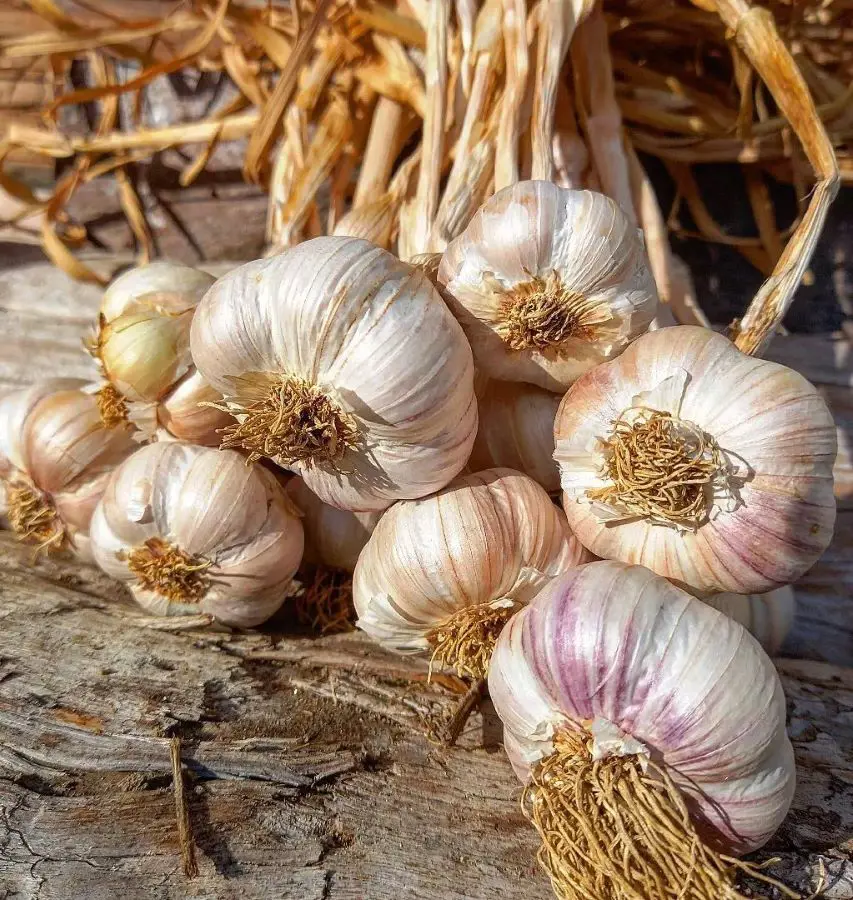
Clean And Cure The Garlic
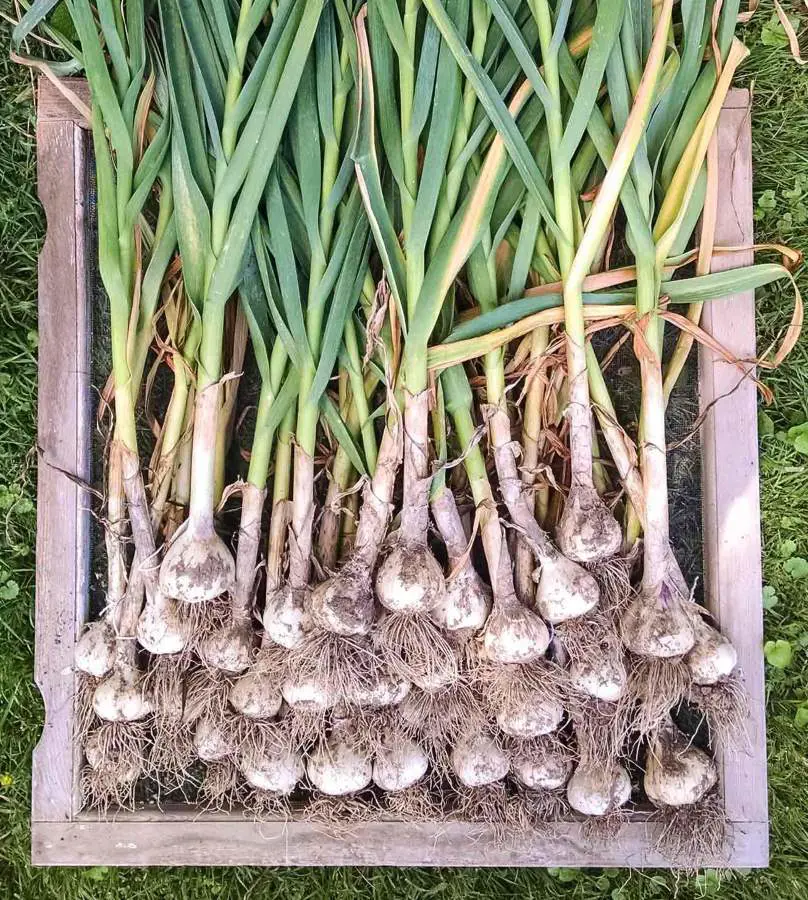
After harvesting, gently brush off any excess dirt from the bulbs, but avoid washing them as this can increase the risk of mold during the curing process. Once cleaned, lay the garlic bulbs out in a single layer in a warm, dry, well-ventilated area, such as a garage or porch, to cure. Allow the bulbs to cure for 2-4 weeks, or until the outer skins are dry.
Dry and cure garlic using these steps and tips:
- Brush off excess soil from the bulbs and remove any remaining dirt by gently rinsing them with water.
- Allow bulbs to dry in a well-ventilated area with good air circulation.
- Hang them in bundles or spread them out on a mesh rack to dry best.
- Let the garlic cure for 2 to 4 weeks until the outer skins become papery and the necks feel dry and firm.
- Once fully cured, trim the roots and cut back the tops if desired.
- Then, store the garlic bulbs in a cool, dry place with good air circulation for long-term storage.
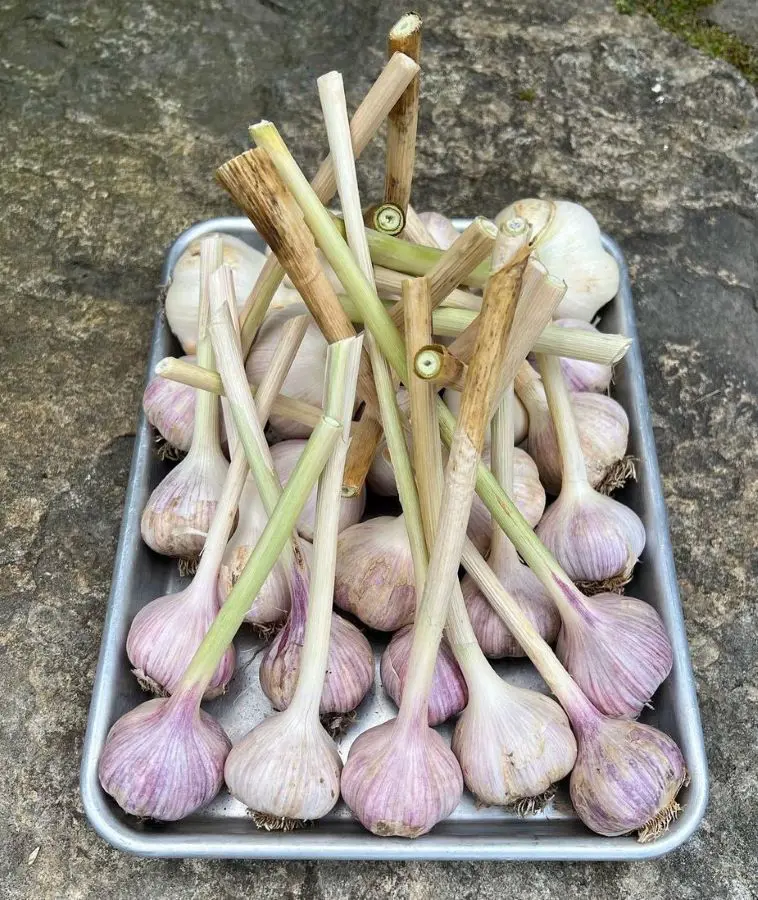
Trim The Tops
After the garlic dries, it's important to cut off the green parts and the roots. You can use scissors or a knife for this. First, cut off the top part where the green stem sticks out. Make sure to remove any parts that look dry or strange. Then, trim the roots at the bottom of the garlic, getting rid of any that are loose or damaged.
When you trim, try to leave about an inch of the green stem still attached to the garlic. This helps keep the garlic fresh when you store it. It stops too much moisture from getting in and prevents the garlic from going bad. Just be careful not to cut too close to the garlic, or the cloves might dry out or spoil.
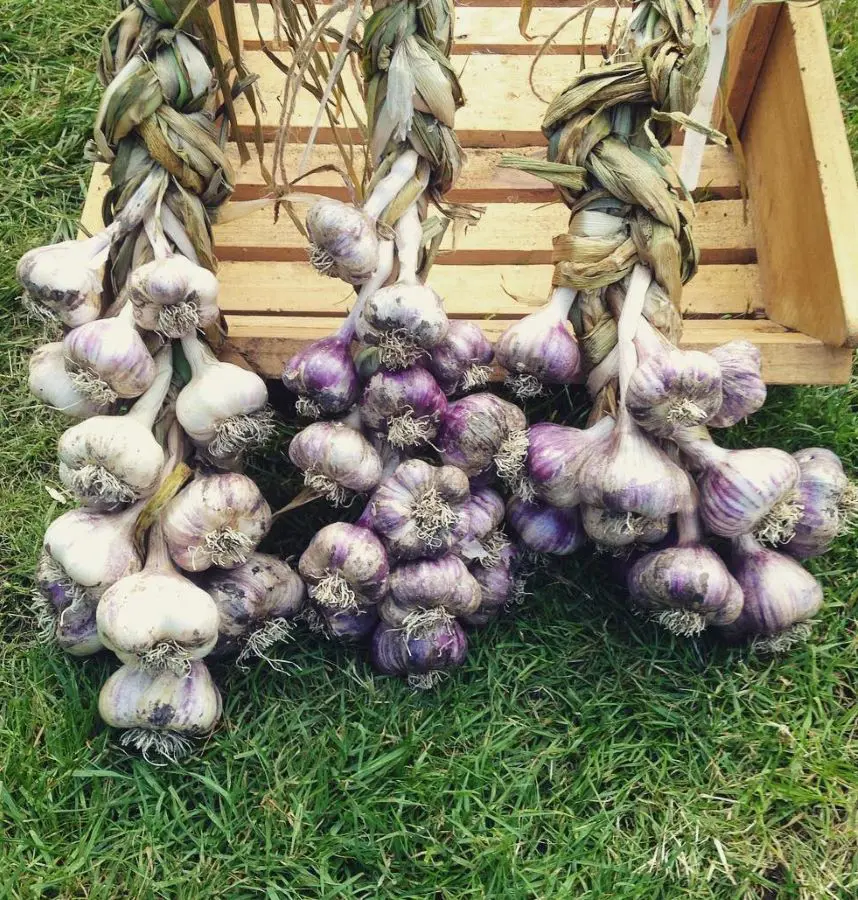
Tips For Storing Garlic Properly
Finally, store the trimmed and inspected garlic bulbs in a cool, dry place with good air circulation. You can hang them in bundles, store them in mesh bags, or place them in well-ventilated baskets. Properly cured and stored garlic can last for several months, allowing you to enjoy your harvest well into the year.
Here's the best way to store garlic properly:
- Store in a cool, dry place: Aim for a temperature between 60° and 65°F, but don't worry if your home isn't exactly that precise. A pantry, cabinet, or well-ventilated basket on the counter (out of direct sunlight) are all good options.
- Allow for air circulation: Avoid storing garlic in airtight containers or plastic bags, which can trap moisture and lead to spoilage. Instead, use a mesh bag, paper bag, wire basket, or even a bowl.
- Separate from other produce: Garlic easily absorbs the odors and flavors of other vegetables and fruits. To prevent it from taking on unwanted tastes, it's best to store garlic separately from other produce. An airtight container or a designated section of the refrigerator can help maintain its distinct taste and aroma.
Recent posts
Gardening

Gardening
How To Grow Grass From Seed? Planting And Caring Guide
Growing grass seems like an easy task. But the ones who are already into it know how much work and patience is required for its maintenance, to transform the outdoor space into a lush, green oasis. For beginners who are starting from scratch or someo...
Gardening
How To Grow, Plant And Care Milkweed From Seed
Planting milkweed from seed is one of the most satisfactory practices. It not only adds value to your garden aesthetics but also contributes essential instinct pollinators, including monarch butterflies. Many milkweed seeds germinate best when expos...

Gardening
18 Rose Colors And Their Meanings
Roses are not only elegant flowers but they also represent something more profound. Every color of a rose has its special meaning, making it a powerful tool when it comes to conveying messages in personal relationships and occasions. Ranging fr...
Gardening
When To Plant Vegetables – A Month By Month Calendar
Understanding when to plant vegetables is essential to successful gardening as timing alone can greatly affect the productivity and health of vegetables. A month-by-month planting calendar is useful because not every month is ideal for a specific pro...

Gardening
How To Prune Hydrangeas So That It Stays Healthy
The name hydrangea conjures clusters of flowers packed densely. Hydrangeas can grow in both old and old wood, and depending on the varieties, pruning time may differ. Pruning hydrangeas is a fundamental practice for gardeners wanting to maintain thei...
Gardening
How To Prune Roses With These 10 Steps
Pruning these thorn-filled plants might seem scary, but it's crucial for having abundant rose blooms. Cutting back old growth encourages new, vibrant growth, removes dead parts, and shapes the plant. This practice also reduces the risk of fungal dise...