Phalaenopsis Orchids Care And Growing Guide
By Mlbrun Team
On Apr 19, 2024

This post may contain affiliate links. If you make a purchase through links on our site, we may earn a commission.
Phalaenopsis Orchids make fantastic additions to your garden for their stunning beauty and air-purifying abilities. Their vibrant blooms enhance aesthetic appeal while filtering and improving air quality.
While Phalaenopsis Orchids can be easily handled by a beginner, all plantowners should refrain from committing mistakes that can damage the plant. For instance, you should never water the crown of this flowers. Grow a healthy moth orchid today with this exclusive care guide.
Phalaenopsis (Moth) Orchids
| Scientific Name | Phalaenopsis spp. |
| Common Name | Moth Orchids |
| Family | Orchidaceae |
| Type | Epiphytic or lithophytic orchids |
| Size | 12-36 inches height, 12-24 inches spread |
| Sunlight Requirement | Indirect, filtered light |
| Soil Type/pH | Epiphytic orchid mix or bark mix, pH range 6.0-7.0 |
| Growing Season | Year-round |
| USDA Growing Zone | 10-12 |
| Native Area | Southeast Asia |
What is A Phalaenopsis Orchid?

Phalaenopsis orchids, commonly known as moth orchids, are a popular and diverse genus of epiphytic orchids native to Southeast Asia, Australia, and the Indian subcontinent. Renowned for their elegant, long-lasting flowers, Phalaenopsis orchids have become one of the most widely cultivated and enjoyed orchid varieties worldwide.
These plants are characterized by their broad, flat, and often vibrant-colored blooms, resembling the shape of moths. They are available in an extensive range of colors and patterns.
Additionally, Phalaenopsis orchids are favored for their adaptability to indoor environments and relative ease of care compared to other orchid species. Their unique reproductive strategy involves producing minute seeds that require a fungus to germinate, making propagation challenging.
Phalaenopsis Orchids Care
Taking good care of orchids is crucial for their long-lasting health and beauty. If not cared for properly, various factors can negatively impact their ability to bloom and grow.
To bring out the best in orchids, it's important to grasp and pay attention to factors like light, temperature, humidity, watering, and fertilizing needs. By understanding and meeting these requirements, you can ensure that your orchids thrive and display their full beauty for many years to come.
Light
Moth orchids, known for their easy indoor growth, thrive in bright, indirect light. Avoid direct sunlight as it can harm their leaves. Optimal spots include east and north-facing windows, while south-facing ones may need a sheer curtain for shading.
These orchids won't do well in dimly lit spaces, but fluorescent lights can help in such areas. Position the light fixture 6 to 8 inches above the plants and keep it on for 12 to 16 hours daily to ensure their well-being and vibrant growth.
Water
To keep moth orchids thriving, it's safer to avoid overwatering. Let the planting material (bark or moss) slightly dry between waterings, but don't leave it dry for too long. The bark needs more frequent watering than moss.
Water when the material feels dry and the pot is light. This might be once or twice a week for bark, less for moss. Factors like light, seasons, humidity, and planting material affect drying speed. Crucially, never let orchid roots sit in standing water. Be mindful, especially with miniature moth orchids in smaller pots, as they can dry out faster.
Soil
Moth orchids prefer a special soil mix comprising bark and sphagnum moss for water retention. Using only bark can dry out rapidly or trap too much moisture, causing issues. Occasionally, these orchids are sold in pure sphagnum moss, demanding vigilant watering to prevent overhydration.
It's crucial to repot them every few years using fresh growing medium to maintain their well-being. This ensures a balanced environment, preventing soil-related problems and supporting healthy growth for these beautiful orchids. Keep an eye on their soil conditions, and the occasional repotting will keep them flourishing in optimal conditions.
Temperature
Moth orchids thrive in temperatures between 70 to 80 degrees Fahrenheit during the day and 60 to 70 degrees Fahrenheit at night. To stimulate flower development, cool nighttime temperatures of 55 to 60 degrees Fahrenheit in the fall are beneficial.
It's crucial to steer clear of temperatures below 55 degrees Fahrenheit, as orchids are sensitive to cold. Seasonal temperature variations, especially the cool nights in the fall, play a pivotal role in encouraging the stunning flowers that make moth orchids a favorite among indoor and outdoor gardeners alike.
Humidity
Phalaenopsis orchids like humidity between 40 to 60%, but many homes have lower levels, especially in winter. To boost humidity, use a room humidifier or place the orchid on a tray of pebbles with water, ensuring the pot stays above the waterline.
As the water evaporates, it raises the humidity around the plant. This simple trick helps recreate the orchid's preferred environment, promoting healthier growth and vibrant blooms, even in homes where natural humidity might be insufficient. Keep the orchid happy by mimicking the humidity it loves, especially during drier seasons.
Fertilization
To keep Phalaenopsis orchids healthy, use fertilizer, but don't overdo it. Too much fertilizer might make the plant grow a lot but reduce its ability to produce flowers. A good rule is to fertilize every third or fourth watering when the plant is actively growing or flowering.
Use a commercial orchid fertilizer and follow the instructions on the label. During winter, when it's cooler and there's less light, it's best to skip fertilizing. This way, you provide the right nutrients at the right times, ensuring your orchids grow beautifully without sacrificing their blooms.
Pruning

Pruning Phalaenopsis orchids is generally minimal compared to other types of orchids. These elegant and popular orchids are known for their long-lasting blooms and relatively straightforward care.
However, there are a few pruning practices that can help maintain the health and appearance of your Phalaenopsis orchid:
1. Removing Spent Flower Spikes
Once the flowers on a spike have faded and dropped, you can prune the spike at the base using clean, sharp scissors or pruning shears. Cut the spike just above a node (the point on the spike where new growth may emerge).
2. Trimming Yellow or Damaged Leaves
Yellow or damaged leaves should be removed to promote overall plant health. Trim the leaves carefully, making sure not to damage the healthy parts of the plant.
3. Cutting Back An Overgrown or Leggy Orchid
If your Phalaenopsis orchid becomes leggy or overgrown, you can trim it to encourage a more compact and bushy growth habit. Cut the stem above a healthy node, and new growth may emerge from that point.
4. Pruning Aerial Roots
Aerial roots are normal for Phalaenopsis orchids, and they play a role in nutrient absorption and stability. However, if they become overly long or unruly, you can trim them back to a more manageable length.
5. Division
Over time, your Phalaenopsis orchid may outgrow its pot. When this happens, you can consider dividing the plant. Remove it from its pot, separate the individual plants, and repot them into fresh orchid mix. This process is typically done when the orchid has several healthy pseudobulbs or growths.
6. Sterilizing Tools
Always use clean and sterilized scissors or pruning shears to prevent the spread of diseases. Wipe the blades with rubbing alcohol or a diluted bleach solution before and after pruning.
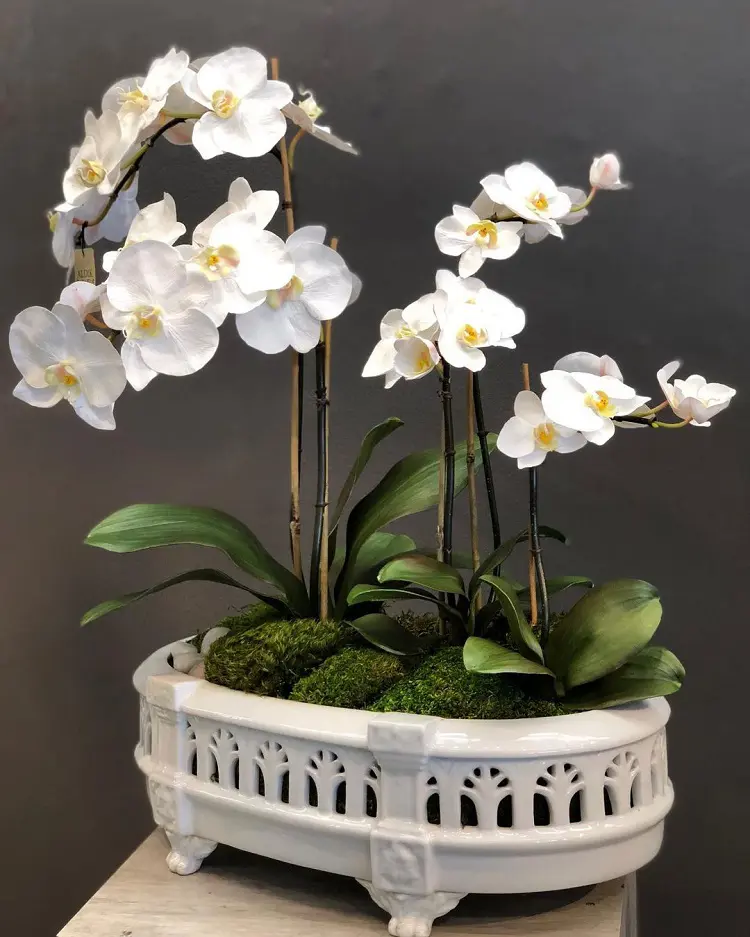
Staking Phalaenopsis Orchids

Staking Phalaenopsis orchids is generally not a common practice because their arching or cascading growth habit usually does not require additional support. However, there are circumstances when staking may be necessary or beneficial:
- Tall flower spikes: If a Phalaenopsis orchid produces particularly tall flower spikes that are at risk of bending or breaking due to their weight, staking may be necessary. This is especially common if the orchid is in a location with increased air circulation or is subject to drafts.
- Multiple flower spikes: Orchids with multiple flower spikes may benefit from staking to keep the display organized and prevent the spikes from tangling or leaning excessively.
- Overgrown or leggy growth: If the orchid has become leggy or has grown unevenly, staking can help support the plant and promote a more upright and balanced appearance.
- Weak stems or pseudobulbs: Some Phalaenopsis orchids may have weak stems or pseudobulbs that are prone to bending. Staking can provide additional support and prevent them from becoming misshapen.
- Injury or damage: If an orchid has experienced injury or damage to its stem or leaves, staking may be used to support the affected parts while they recover.
- Heavy flower clusters: If your Phalaenopsis orchid produces particularly large and heavy flower clusters, staking can help prevent the stems from bending or breaking under the weight.
- Unstable growing conditions: In locations with frequent drafts or high air movement, orchids may benefit from staking to prevent swaying, which can lead to stem damage.
- Leggy growth: If the orchid has grown tall and leggy with weak stems, staking can help provide support and maintain an upright position.
- Multiple spikes: When an orchid has multiple flower spikes, staking can help organize and display the blooms more effectively.
Propagating Phalaenopsis Orchids
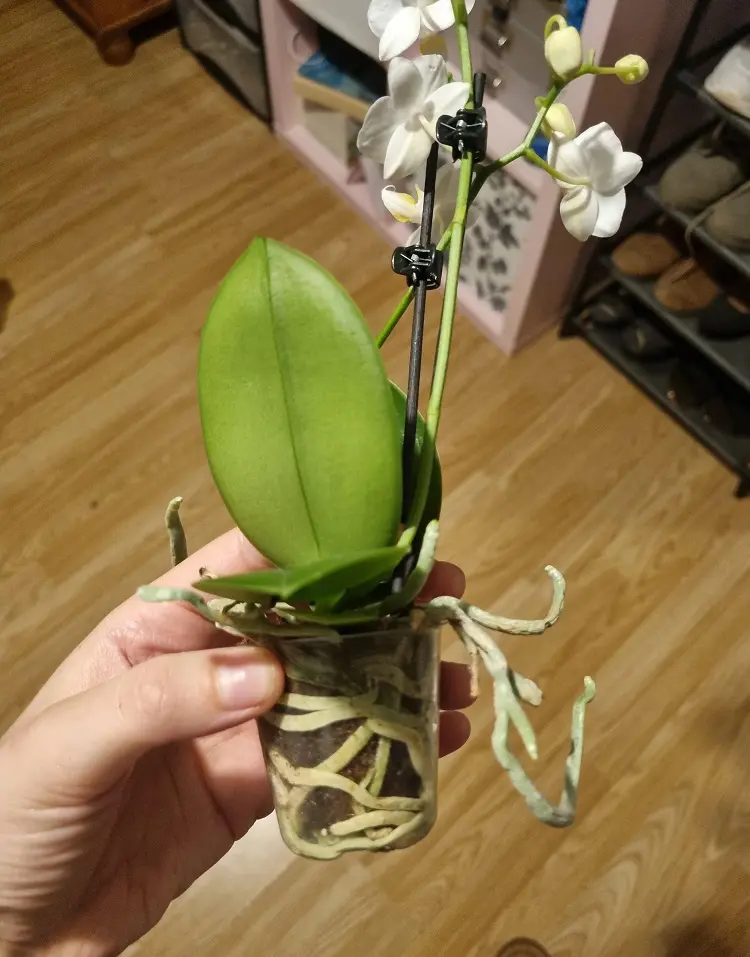
Propagating Phalaenopsis orchids involves creating new plants from existing ones. While propagation doesn't directly encourage the growth of the parent plant, it promotes genetic diversity and rejuvenation.
If Phalaenopsis orchids are not propagated, they may become crowded, potentially hindering overall plant health. Phalaenopsis orchids can be propagated through several methods, with the most common being:
Keiki Production
Some Phalaenopsis orchids naturally produce small offshoots known as keikis along the flower spike. These can be left attached to the parent plant until they develop roots and leaves, after which they can be carefully detached and potted.
Division
When the orchid has multiple pseudobulbs or growths, it can be divided into separate plants. Gently remove the orchid from its pot, separate the individual plants, and repot them into fresh orchid mix.
Stem Cuttings
In some cases, a healthy portion of the stem with a node can be cut and placed in a suitable medium to encourage the development of roots. This method requires careful handling and is not as common as other propagation techniques.
Back-Bulb Propagation
Phalaenopsis orchids produce pseudobulbs, and back-bulb propagation involves separating and potting these older bulbs that may have lost their leaves. Given proper care, new growth can emerge from these back bulbs.
Tissue Culture
Tissue culture is a more advanced method used by commercial orchid producers. It involves taking a small piece of tissue from the plant and placing it in a sterile medium to encourage the growth of new plants.
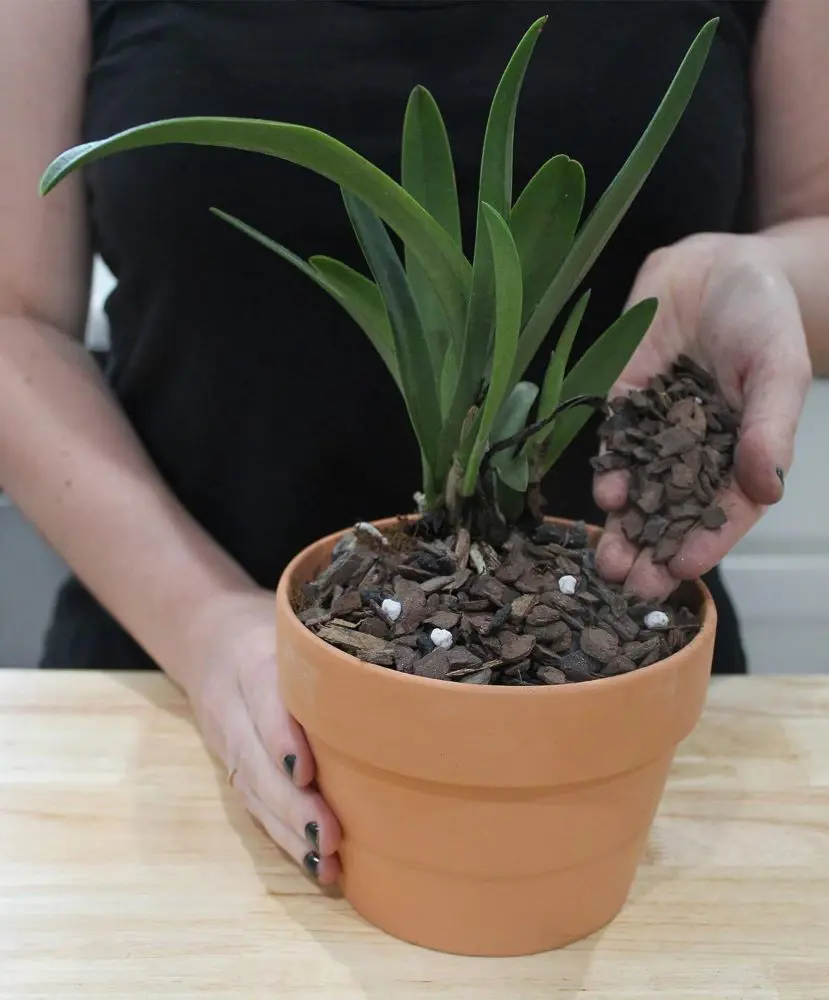
Potting and Repotting
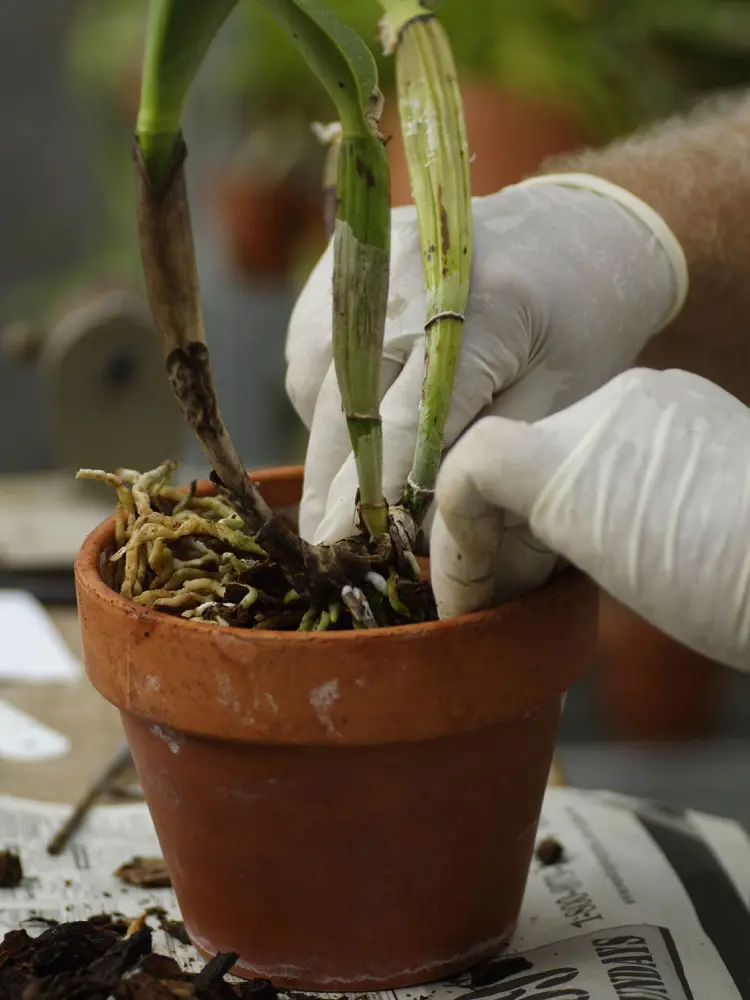
Potting and repotting Phalaenopsis orchids is essential for their health and well-being. Generally, it is done to protect the plant in winter or when the old pot can no longer support the orchid.
Potting
The process of potting can be summarized as:
- Select a pot with good drainage holes to prevent waterlogging. Orchid pots with slits or clear plastic containers are ideal.
- Use a well-draining orchid mix, often a blend of bark, perlite, and sphagnum moss. This allows for proper aeration and prevents root rot.
- Before potting, inspect the orchid's roots. Trim any dead or rotting roots, leaving healthy ones.
- Place the orchid in the center of the pot, ensuring the roots are spread evenly. The base of the leaves should sit just above the pot rim.
- Add the orchid mix around the roots, gently pressing it down. Leave some space at the top for watering.
Repotting
Repot Phalaenopsis orchids every 1-2 years, or when the potting medium breaks down, and the orchid outgrows its container. Take a look at the process:
- The best time to repot is after flowering when the orchid is in a growth phase.
- Carefully remove the orchid from its pot. If the roots are overgrown or circling, trim them to encourage healthier growth.
- Rinse the roots under tepid water to remove old medium and debris.
- Check for signs of pests, diseases, or rot. Treat any issues before repotting.
- Follow the potting steps mentioned earlier in the "Potting" section.
Common Pests And Prevention
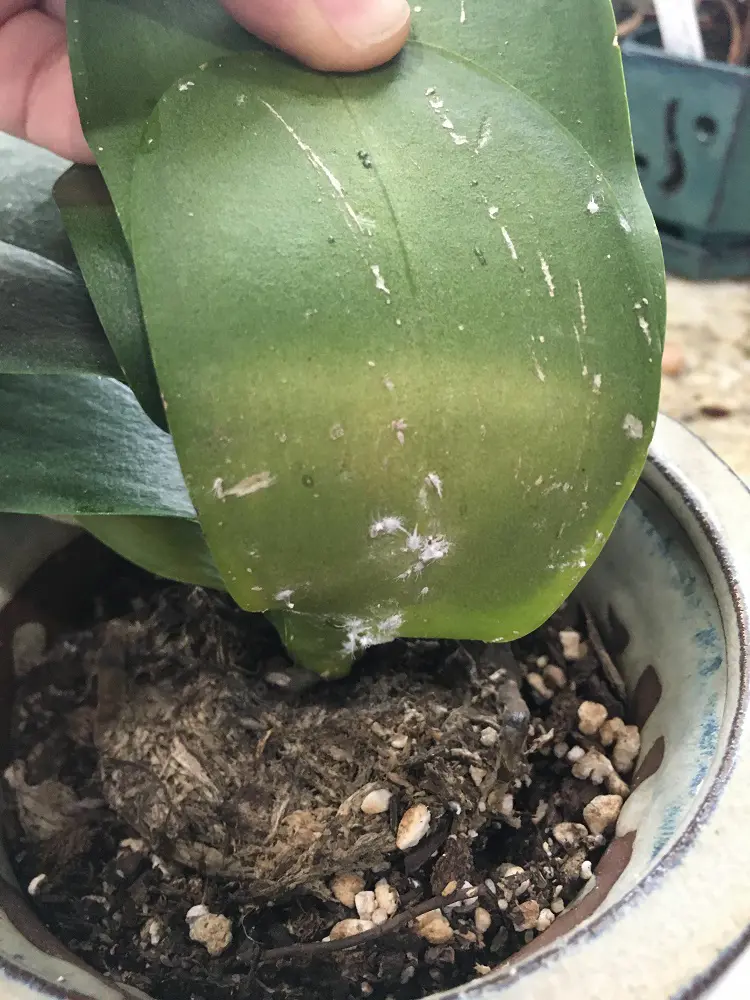
Phalaenopsis orchids can suffer significant damage from pests. Pest infestations in these plants can cause deformed flowers, bud blast, and leaf discoloration.
Moreover, common pests like aphids, mealybugs, and scale insects are known to cause weakened foliage and stunted growth. Early detection and isolation of affected plants are crucial for preventing further damage.
- Scale Insects: These small, oval-shaped insects attach themselves to the orchid and feed on sap. They often appear as small, raised bumps on leaves or stems.
- Aphids: Tiny, soft-bodied insects that cluster on new growth, buds, or the undersides of leaves, sucking sap and causing distorted growth.
- Spider Mites: These tiny arachnids feed on plant juices, causing stippling on leaves and leaving fine webbing. They thrive in dry conditions.
- Mealybugs: Soft, cottony insects that feed on sap and often hide in the leaf axils or crevices. They can cause leaf yellowing and distortion.
- Thrips: Slim, tiny insects that feed on flower buds, causing them to appear deformed or discolored.
Control and Prevention
- Regularly check your orchids for signs of pests, especially on the undersides of leaves and in crevices.
- If you notice pests, isolate the affected orchid to prevent the infestation from spreading to other plants.
- Trim and remove parts of the plant with severe infestations. Dispose of the removed material away from other plants.
- Use insecticidal soap or neem oil to treat pests. These are safer options for orchids. Follow the instructions on the product carefully.
- Introduce beneficial insects like ladybugs or predatory mites that can help control certain pests.
How To Get Phalaenopsis Orchid To Bloom
To encourage Phalaenopsis orchids to bloom, provide optimal conditions. Ensure they receive bright, indirect light, avoiding direct sunlight. Maintain temperatures, water the orchid thoroughly but allow the medium to dry slightly between waterings.
Use a balanced orchid fertilizer regularly during the growing season, reducing it in the winter. Lastly, be patient, as Phalaenopsis orchids may take several weeks to months to initiate and complete their blooming cycle.
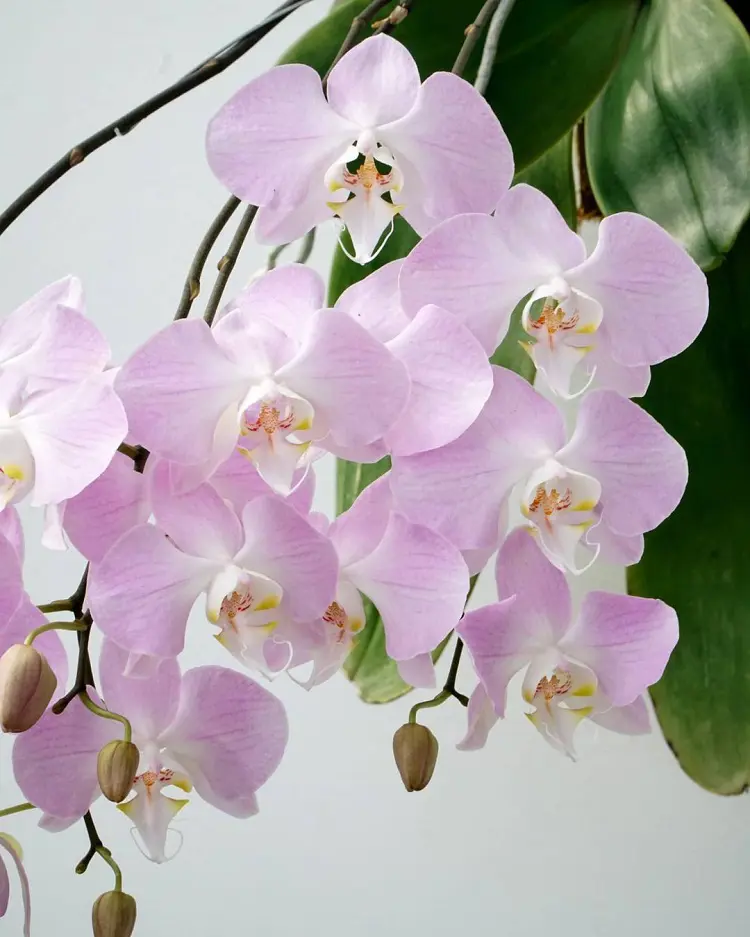
Appearance and Frangrance While Blooming
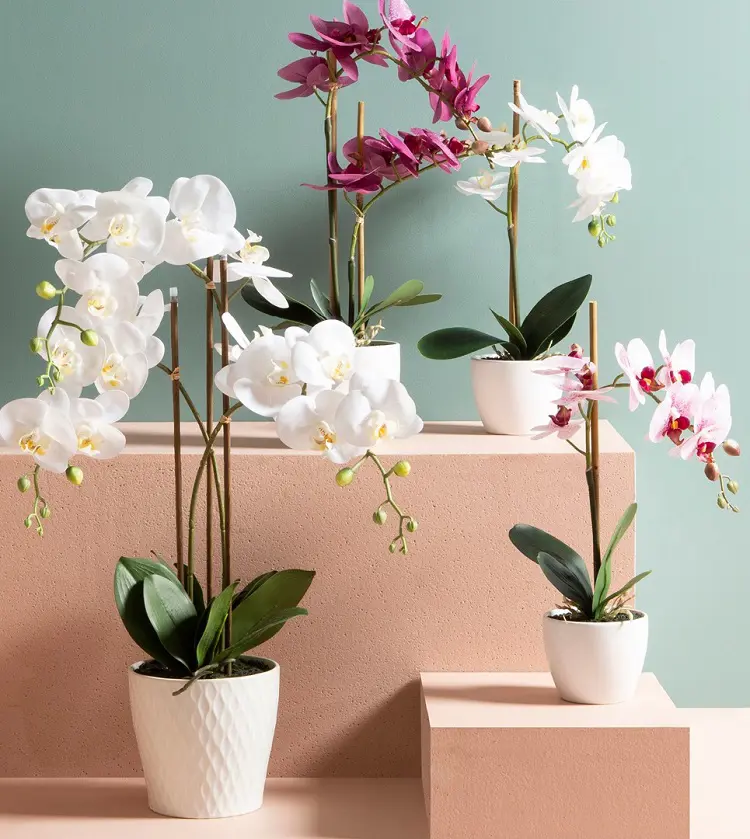
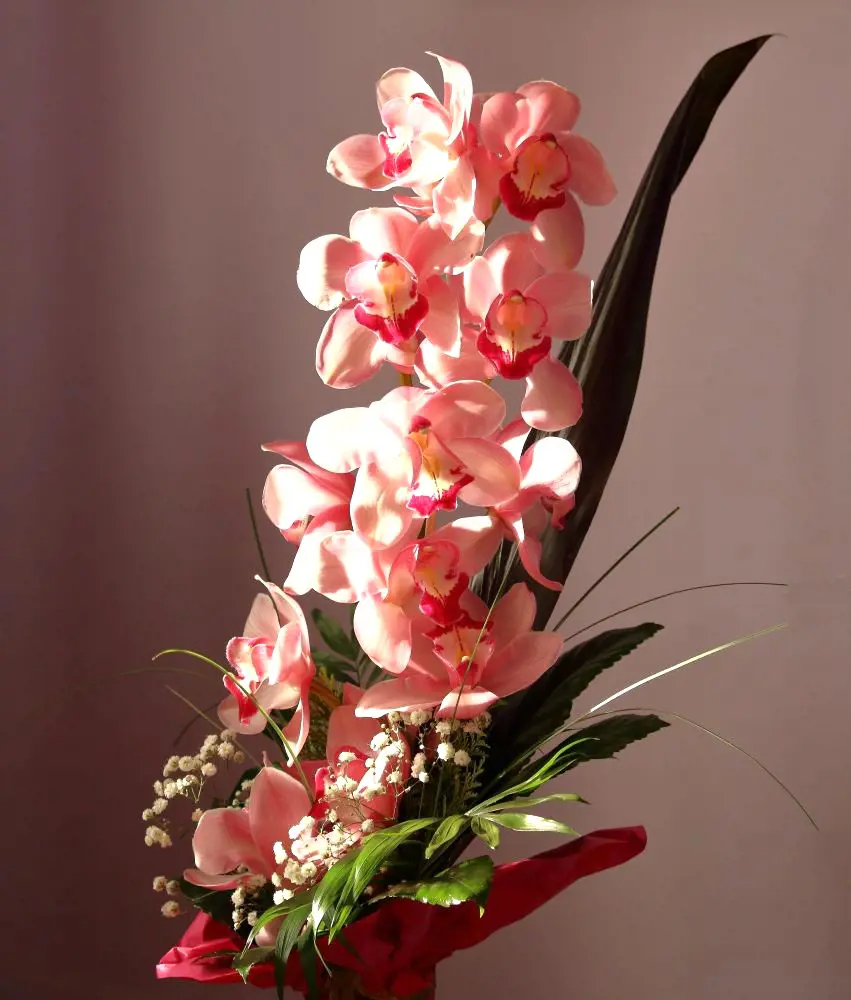
Phalaenopsis orchids, when in bloom, showcase stunning and diverse appearances. Their elegant flowers feature vibrant colors such as white, pink, purple, yellow, or a combination of hues. Each spike can carry multiple blossoms, and their longevity often extends several months.
Regarding fragrance, not all Phalaenopsis orchids are scented, but some varieties do emit a delicate, pleasant scent. Fragrance intensity varies among species and hybrids. Typically, scented Phalaenopsis orchids release their fragrance during the day, reaching its peak in the afternoon or evening.
Phalaenopsis Orchids Types
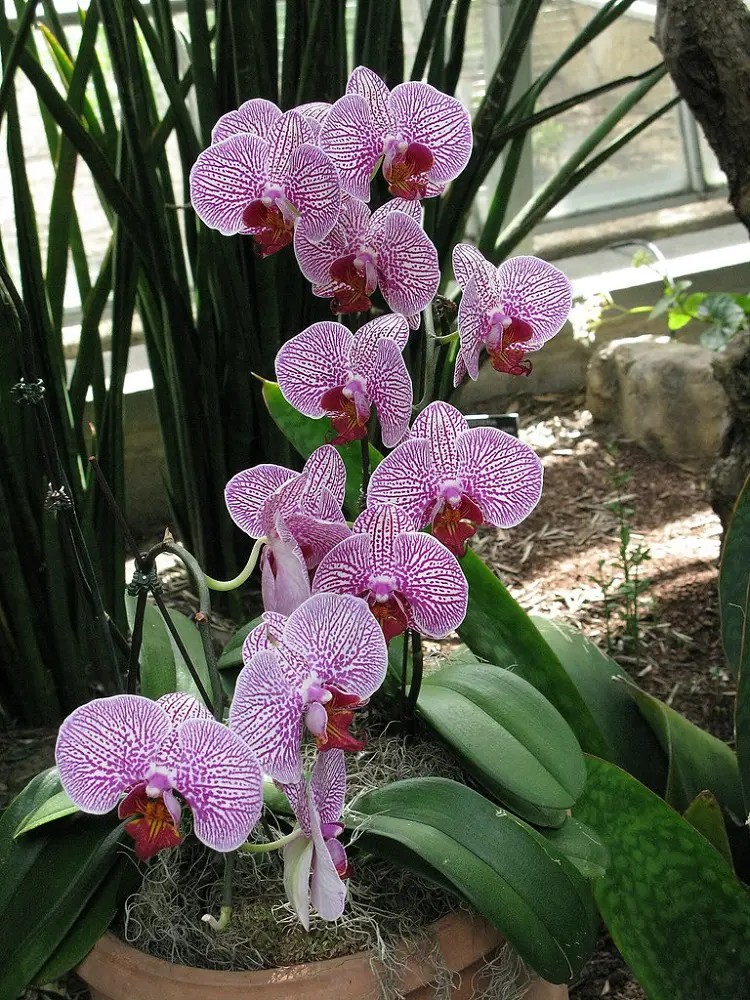
Phalaenopsis orchids has 63 registered types that are different from each other in colors, patterns, and forms. Some notable types include:
1. Phalaenopsis amabilis: Known as the "Moon Orchid," it's the species from which many hybrids are derived, featuring white or pale-colored flowers.
2. Phalaenopsis hybrid: Numerous hybrids result from crosses between different Phalaenopsis species, leading to an extensive range of colors, patterns, and sizes.
3. Miniature Phalaenopsis: Compact varieties, often with smaller flowers and shorter spikes, ideal for indoor spaces with limited room.
4. Phalaenopsis schilleriana: Recognizable by its distinct spotted leaves and fragrant flowers, featuring shades of pink and purple.
5. Phalaenopsis violacea: Native to Southeast Asia, known for its strikingly beautiful violet-hued flowers and pleasant fragrance.
6. Phalaenopsis tetraspis: Unique for its tessellated or mottled leaf pattern and elegant flowers with a combination of white, pink, and purple.
7. Variegated Phalaenopsis: Exhibiting variations in leaf coloration, adding visual interest even when not in bloom.
Challenges With Phalaenopsis Orchids
Growing Phalaenopsis orchids can come with various challenges. Here are common problems and solutions:
Flopping
- Problem: Underwatering causing flopping and yellow leaves.
- Solution: Resume regular watering, ensuring the orchid doesn't go without water for extended periods. Gradually increase humidity to aid recovery.
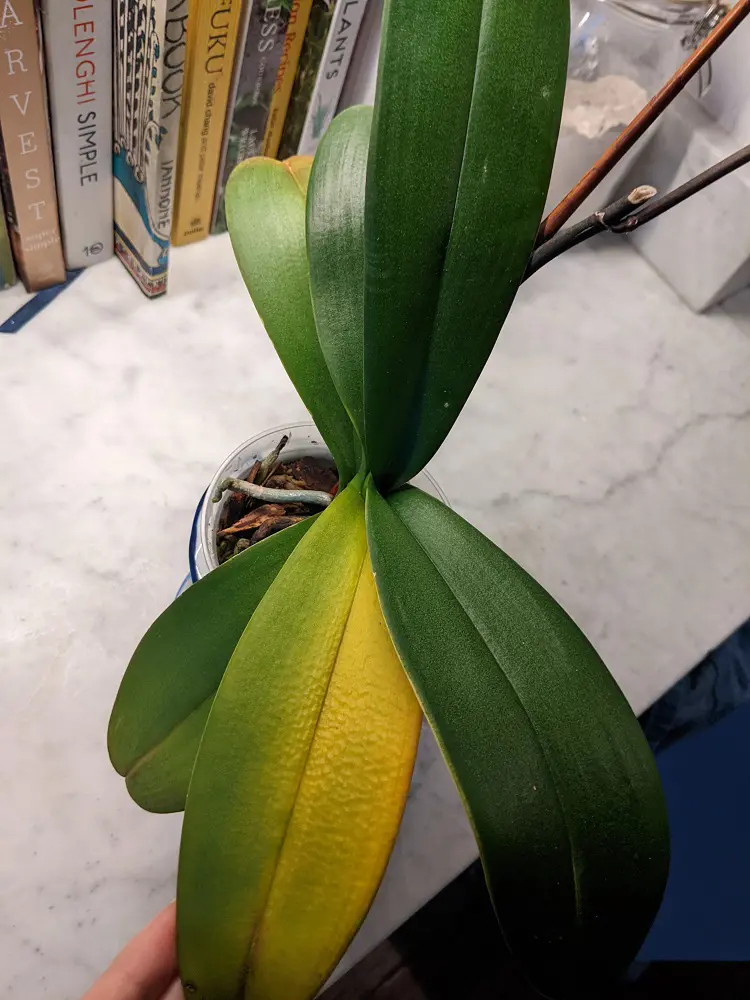
Yellow Leaves
- Problem: Natural leaf loss, sun exposure, temperature extremes, overwatering, or insufficient fertilizing.
- Solution: Monitor sun exposure, protect from extreme temperatures, adjust fertilizing frequency, and ensure a well-draining medium. Prune yellow leaves and observe for improvements.
Bud Drop
- Problem: Bud drops due to water issues, insects, temperature extremes, or inappropriate movement.
- Solution: Maintain consistent watering, protect from pests, avoid sudden temperature changes, and refrain from moving the orchid until after flowering.
Root Rot
- Problem: Overwatering or poorly draining medium leading to root rot.
- Solution: Adjust watering frequency, use well-draining orchid mix, and trim affected roots. Repot if necessary.
Fungus or Mold
- Problem: Excessive humidity or poor air circulation causing fungus or mold.
- Solution: Increase air circulation, avoid overcrowding, and maintain proper humidity levels. Treat affected areas with fungicides if necessary.
No Blooms
- Problem: Insufficient light, improper temperature, or overfertilization.
- Solution: Provide bright, indirect light, maintain optimal temperature, and reduce fertilizer frequency. Allow the orchid a dormant period to encourage blooming.
Recent posts
Plant Care
Plant Care
How To Take Care Of An Orchid Plant? 11 Tips And Tricks
If you love gorgeous orchids but are worried they're too high-maintenance, don't worry. This guide is like a cheat sheet for orchid newbies. Forget fancy words and confusing schedules — we're talking about how to take care of an orchid pla...

Plant Care
How To Grow and Care For Peace Lily Plant
The Peace Lily is an indoor plant that is most valued for its beautiful and shiny green leaves as well as the white blooms. Hard and tolerant, it’s naturally a low-maintenance addition to your plant collection. If you are confused, let us tell ...
Plant Care
Pothos Plant Care And Growing Guide
Adding a Pothos plant (Devil’s Ivy) to your home benefits the environment and aesthetic of your personal space. It's easy to maintain and is loved for it's ability to enhance indoor air quality by removing toxins like formaldehyde, benzene, and...
Plant Care
Snake Plant Care and Growing Guide
Snake plants require low maintenance, and low light and are almost impossible to kill, making them a perfect plant for beginners and seasoned gardeners. In this guide, we will explore essential care tips and optimal growing conditions for snake plant...
Plant Care
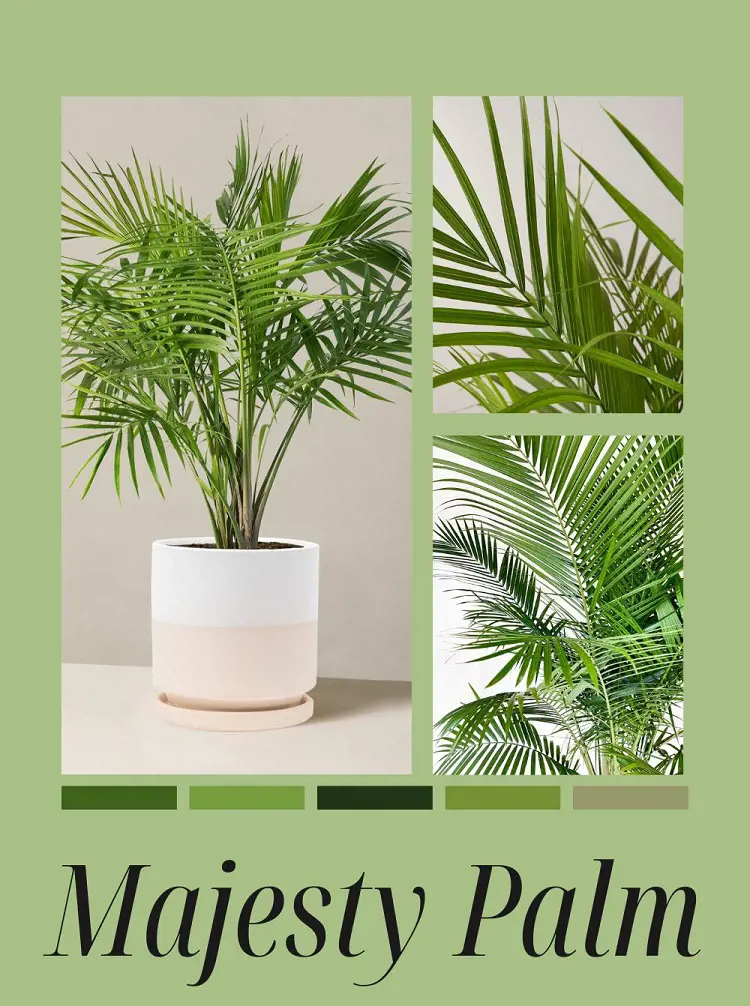
How To Plant, Grow and Care Majesty Palm
The majestic palm, scientifically known as Ravenea rivularis, makes for a stunning indoor tree with its lush and grand fronds. Originating from Madagascar's river banks, this resilient houseplant is cherished not only for its beauty but also for its ...
Plant Care
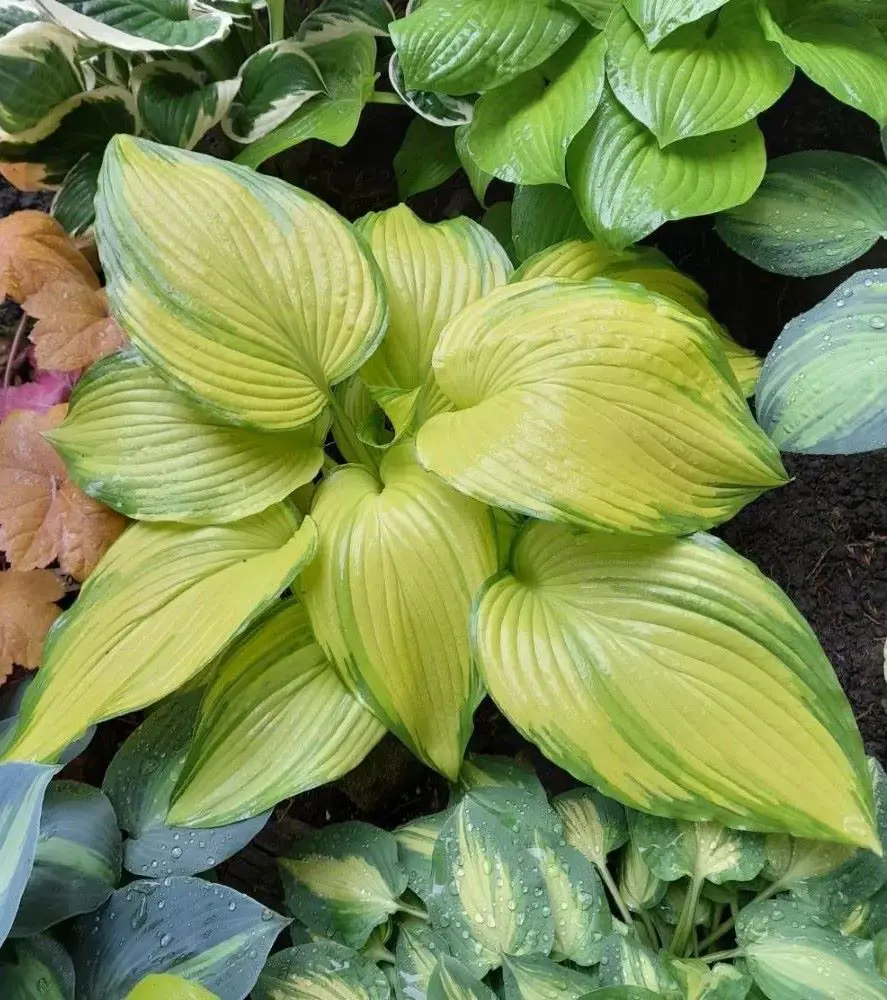
How To Grow And Care For A Hosta Plant
Hosta plants are widespread perennials, often grown for their beautiful and diverse foliage. They are extremely easy to care for and can thrive in various conditions, particularly shade or semi-shade. These hardy plants can last for many years and re...